1.Login to your blogger dashboard--> layout- -> Edit HTML
2.Scroll down to where you see </head> tag .
3.Copy below code and paste it just before the </head> tag .
<style type='text/css'>
ul {
list-style: none;
margin: 0;
padding: 0;
}
#menu3 {
width: 200px;
border: 1px solid #ccc;
margin: 10px;
}
#menu3 li a {
height: 32px;
voice-family: "\"}\"";
voice-family: inherit;
height: 24px;
text-decoration: none;
}
#menu3 li a:link, #menu3 li a:visited {
color: #888;
display: block;
background: url(http://1.bp.blogspot.com/_4HKUHirY_2U/SwPURj-ZiQI/AAAAAAAAAN8/9leFXbCWnzw/menu3.gif);
padding: 8px 0 0 30px;
}
#menu3 li a:hover, #menu3 li #current, #menu3 li a:active {
color: #283A50;
background: url(http://1.bp.blogspot.com/_4HKUHirY_2U/SwPURj-ZiQI/AAAAAAAAAN8/9leFXbCWnzw/menu3.gif) 0 -32px;
padding: 8px 0 0 30px;
}
</style>
Note : Please Host above image yourself.
4.Save your template.
5.Now Go to Layout-->Page Elements and click on "Add a gadget".
6.Select "html/java script" from header section and add the code given below and click save.
<div id="menu3">
<ul>

<li><a href="#">Home</a></li>
<li><a href="#">HTML</a></li>
<li><a href="#">CSS</a></li>
<li><a href="#">Java Script</a></li>
<li><a href="#">Photoshop</a></li>
<li><a href="#">About</a></li>
<li><a href="#">Contact</a></li>

</ul>
</div>
You are done.It will look like this:
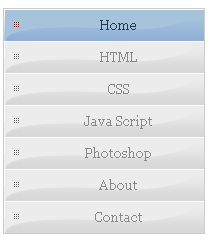
CSS Vertical Menu Tutorials-Menu 3