If you buy your domain name through GoDaddy and web space from another web hosting provider like Hostgator, then you need to setup your domain name's nameservers properly to connect your domain with hosting account. This easy to follow tutorial will show you how to connect your nameservers with your GoDaddy domain name. Each step has explained with pictures, but if you need any help related to this tutorial don't forget to leave a comment below.
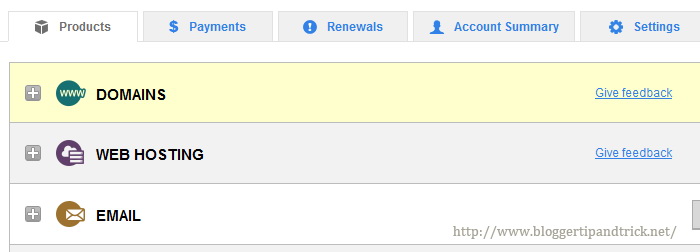
First go to your GoDaddy account. Click on "DOMAINS".
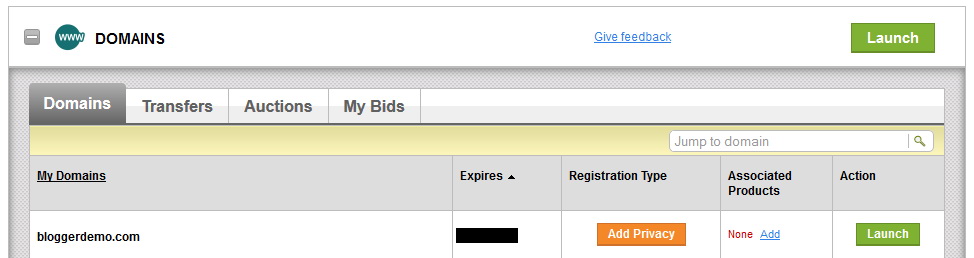
Click on "Launch" button of your domain name.
In next page, your GoDaddy Domain Name Details will be displayed.
Under "Domain Settings" -> "Nameservers", you can see current default nameservers for your domain name.
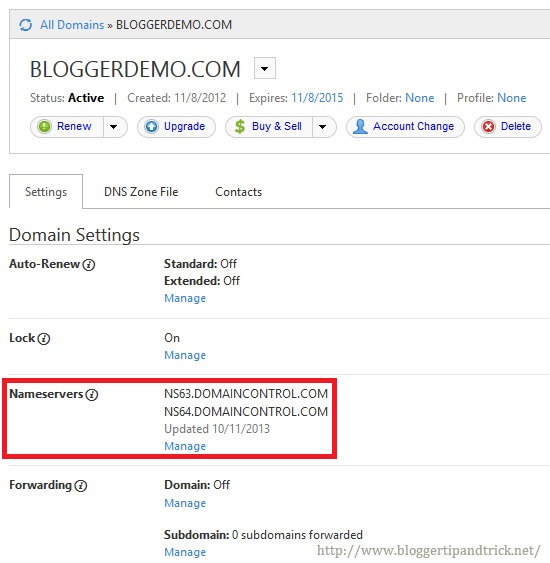
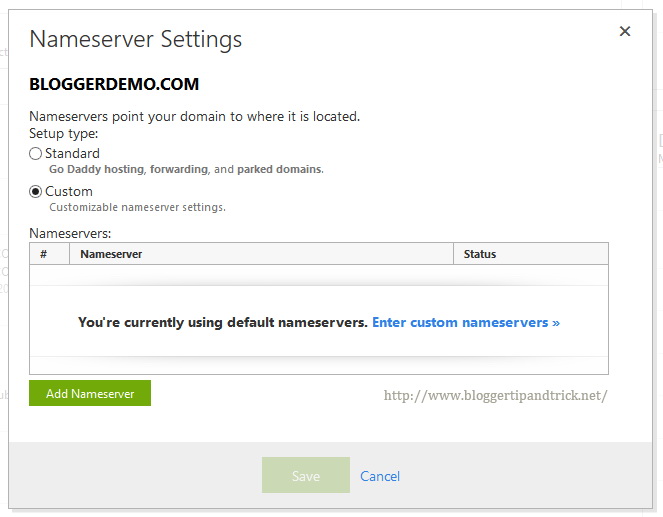
Click on "Manage". Now you will see a window similar to this:
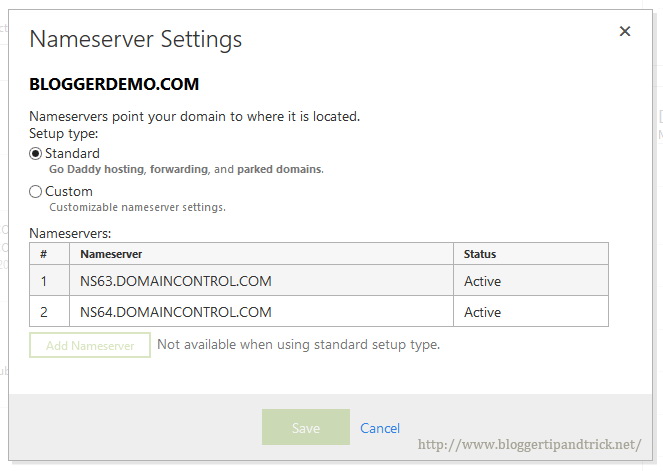
Select nameserver "Setup type" as "Custom" and Click "Add Nameserver".
Now add your new namerserver details like this:
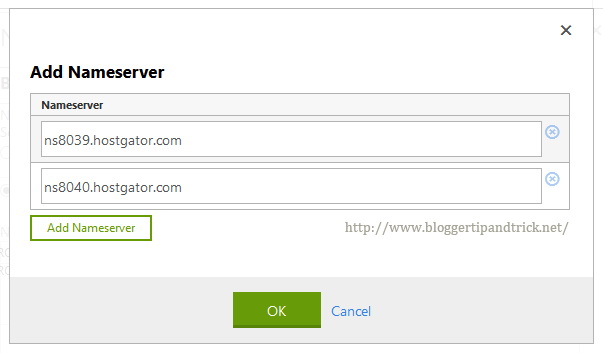
Click "OK".
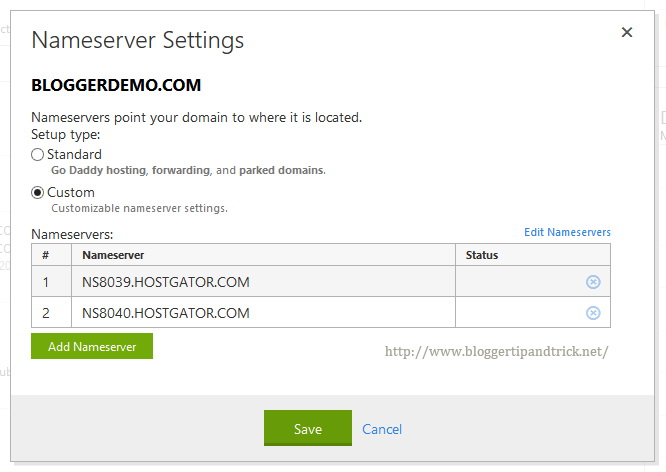
Now new nameservers will be displayed under custom nameservers details. Click "Save".
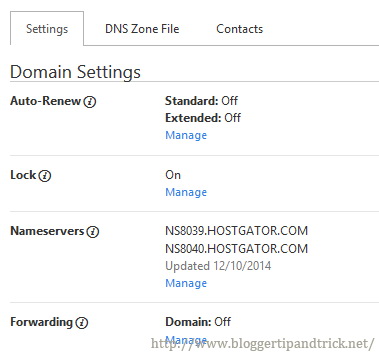
Wait few minutes until domain settings has been updated and now new nameservers will be displayed under "Domain Settings" -> "Nameservers".
Now you have successfully added your nameservers to GoDaddy.