
If you're a developer, tech blogger, or just love sharing code on your Blogger (Blogspot) blog, adding a good syntax highlighter is a must for readability and professional presentation. One of the lightweight tools you can still use is Google Code Prettify, a JavaScript-based syntax highlighter.
This tutorial shows how to easily integrate the Prettify into your Blogger blog, with live examples and alternate skin options.
Step 1: Login to your Blogger account and go to the "Edit HTML" page of your blog.
Step 2: You can load the JavaScript and CSS for prettify via one URL. Add this code just below <head> tag:
<script src='https://cdn.jsdelivr.net/gh/google/code-prettify@master/loader/run_prettify.js'></script>

Step 3: Save your template. You have successfully added Prettify auto-loader to your Blogger blog. Above code will load the entire system and schedule the prettifier to run on page load.
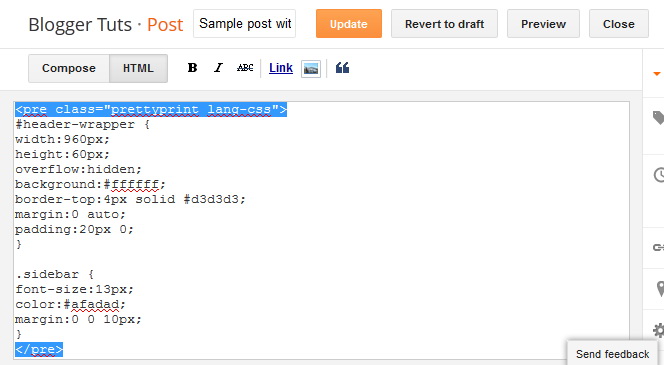
Step 4: Now when you want to display a code snippet in your blogger post, go to the Blogger post editor and select "HTML view".
Step 5: Wrap your code snippet inside a <pre> tag with the prettyprint class like this:
<pre class="prettyprint">
source code here
</pre>
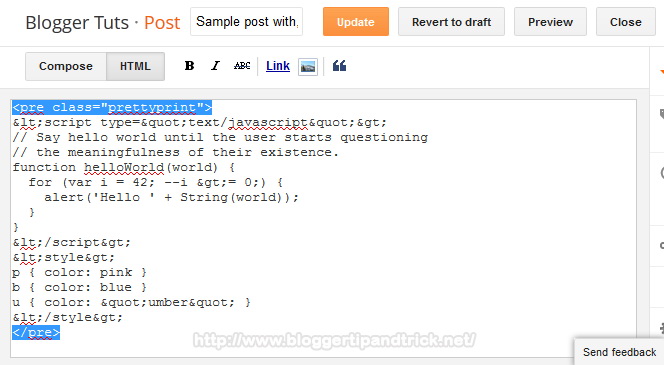
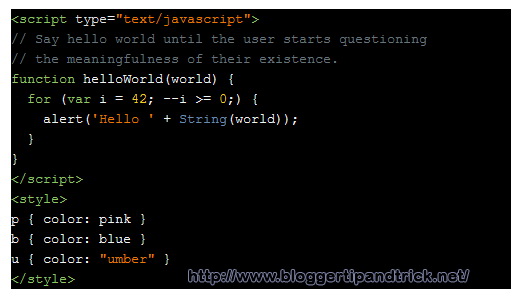
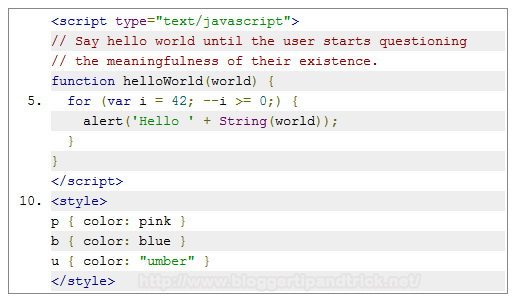
Code Example:
<pre class="prettyprint">
<script type="text/javascript">
// Say hello world until the user starts questioning
// the meaningfulness of their existence.
function helloWorld(world) {
for (var i = 42; --i >= 0;) {
alert('Hello ' + String(world));
}
}
</script>
<style>
p { color: pink }
b { color: blue }
u { color: "umber" }
</style>
</pre>
Note: You must escape special characters in your code snippet before adding it to the HTML. This ensures the browser displays the code correctly instead of interpreting it as actual markup.
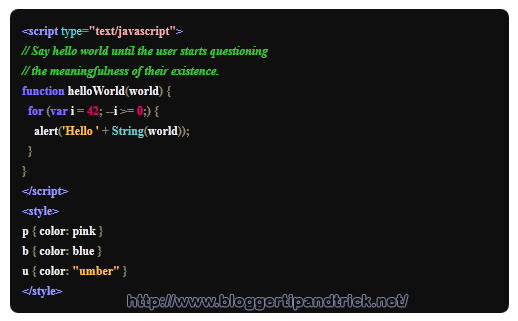
Step 6: Publish/Update your post and view your post. It will look like this:
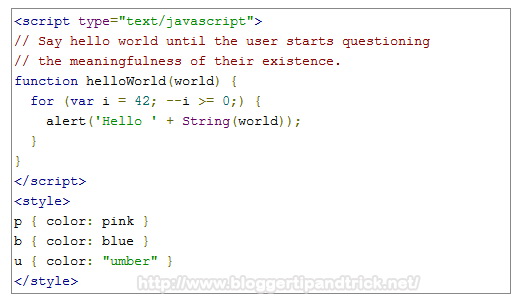
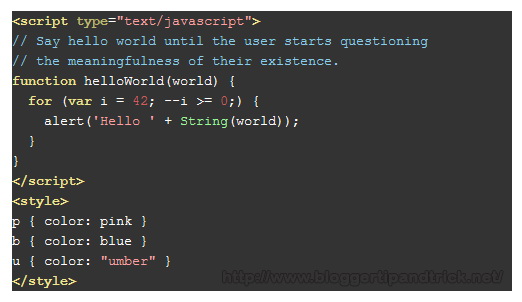
How to Add Different Code Styles
Only you need to do is, replace "Step 2" code with below codes.
Desert Skin:
<script src='https://cdn.jsdelivr.net/gh/google/code-prettify@master/loader/run_prettify.js?skin=desert'></script>
Result:
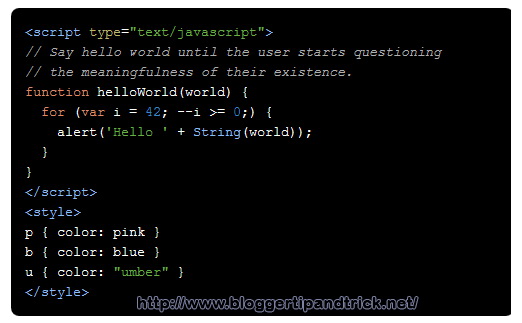
Sunburst Skin:
<script src='https://cdn.jsdelivr.net/gh/google/code-prettify@master/loader/run_prettify.js?skin=sunburst'></script>
Result:
Sons-Of-Obsidian Skin:
<script src='https://cdn.jsdelivr.net/gh/google/code-prettify@master/loader/run_prettify.js?skin=sons-of-obsidian'></script>
Result:
Doxy Skin:
<script src='https://cdn.jsdelivr.net/gh/google/code-prettify@master/loader/run_prettify.js?skin=doxy'></script>
Result:
How to Specify the Language of Your Code
File extensions supported by default include: "bsh", "c", "cc", "cpp", "cs", "csh", "cyc", "cv", "htm", "html", "java", "js", "m", "mxml", "perl", "pl", "pm", "py", "rb", "sh", "xhtml", "xml", "xsl"
The lang-* class specifies the language file extensions.
You can specify other languages by specifying the language extension along with the prettyprint class.
For example, The syntax-highlighting functions contained in lang-css.js will not be called without adding the class "lang-css" to the <pre> tag. So you can add your CSS codes like this:
<pre class="prettyprint lang-css">
CSS code here
</pre>
Example:
View the complete list of Prettify language handlers on GitHub.
How to Display Codes with Line Numbers
To display line numbers, use "linenums" class like this:
<pre class="prettyprint linenums">
source code here
</pre>
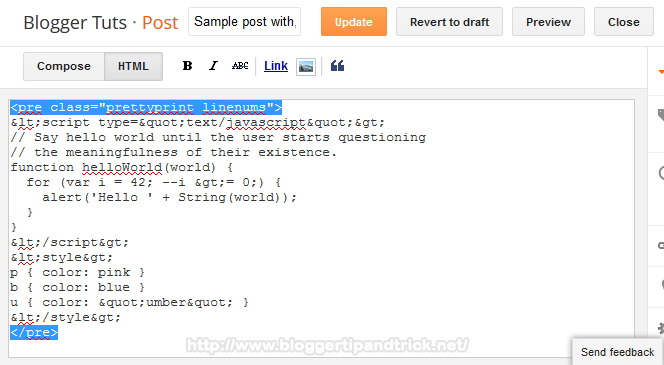
Code Example:
<pre class="prettyprint linenums">
<script type="text/javascript">
// Say hello world until the user starts questioning
// the meaningfulness of their existence.
function helloWorld(world) {
for (var i = 42; --i >= 0;) {
alert('Hello ' + String(world));
}
}
</script>
<style>
p { color: pink }
b { color: blue }
u { color: "umber" }
</style>
</pre>
Result:
Below code will display a CSS code with line numbers:
<pre class="prettyprint lang-css linenums">
body{background:#000000 url(http://3.bp.blogspot.com/-vB6rbTuTh34/UEw9OyUKQJI/AAAAAAAAIoQ/A3dwg6dKC_g/s1600/background.jpg) center top no-repeat;color:#555555;font-family: Arial, Helvetica, Sans-serif;font-size: 13px;margin:0px;padding:0px;}
a:link,a:visited{color:#C11112;text-decoration:underline;outline:none;}
a:hover{color:#FE3D36;text-decoration:none;outline:none;}
a img{border-width:0}
#body-wrapper{margin:0px;padding:0px;}
</pre>
Note: The codes above work not only on Blogger but also on other websites. Simply add the code from Step 2 right after the <head> tag of your webpage, then use any of the provided examples to display syntax-highlighted code.
Google Code Prettify is still a great choice for lightweight syntax highlighting on Blogger or any other website, especially if you don't want to use third-party script builders. It works out-of-the-box, supports multiple languages, and has various themes you can apply in seconds.
very nice tutorial